Gluten Free Can Be Amazing!

Bloomfield Farms Gluten Free Mixes

Bloomfield Farms Gluten Free Mixes

A little over two years ago, my family made a decision to eat a gluten-free diet. Our daughter was diagnosed with Hashimoto’s Thyroiditis and was having an extremely difficult time adjusting to the medications. After a lot of research, it seemed worth a try to assist her in healing by adjusting her diet. This included eliminating several foods, one of which, is wheat gluten.

It may seem like an easy task to accomplish but we discovered it is so much more difficult then one can imagine. Wheat gluten is an additive in so many everyday foods that you may purchase in the grocery store or at a restaurant. Even simple items like french fries, soy sauce, breakfast cereals contain wheat gluten. So, the mission before us was two-fold, we had to check labels and ingredients on everything purchased and we had to find workable alternatives to use in recipes for cooking and baking.

Checking ingredient lists and menu options in restaurants is a never ending task. The safest way to eat in restaurants is to select green salad options and grilled meats. The home baking and cooking, however, became very challenging quickly. There are quite a few packaged options for breads, cookies, cake, pancakes, biscuits, cereal, muffins, and pizza crust on the market shelves. The problem with many of those items for us was that they tasted very bland, dry, gritty and just plain awful!!! They are also pricey and the packages contain less amount of product. I was a bit vocal about my frustration and a local friend sent me an email about Bloomfield Farms.

I quickly found the All Purpose Baking Mix in my local Kroger. I tried it out making pancakes (which were very good), cookies (chocolate chip was relish), and a yellow cake
(which I made into a strawberry poke cake…where you poke holes in the baked cake and pour in jello). All of these baked goods were very good and you could not tell they were gluten free. This made me very curious about other Bloomfield Farms offerings.

A quick visit to their website and I discovered many gluten free products. I could not wait to place an order and try out more products. On my first order, I purchased a muffin mix, pizza crust, bread mix and pancake and waffle mix.

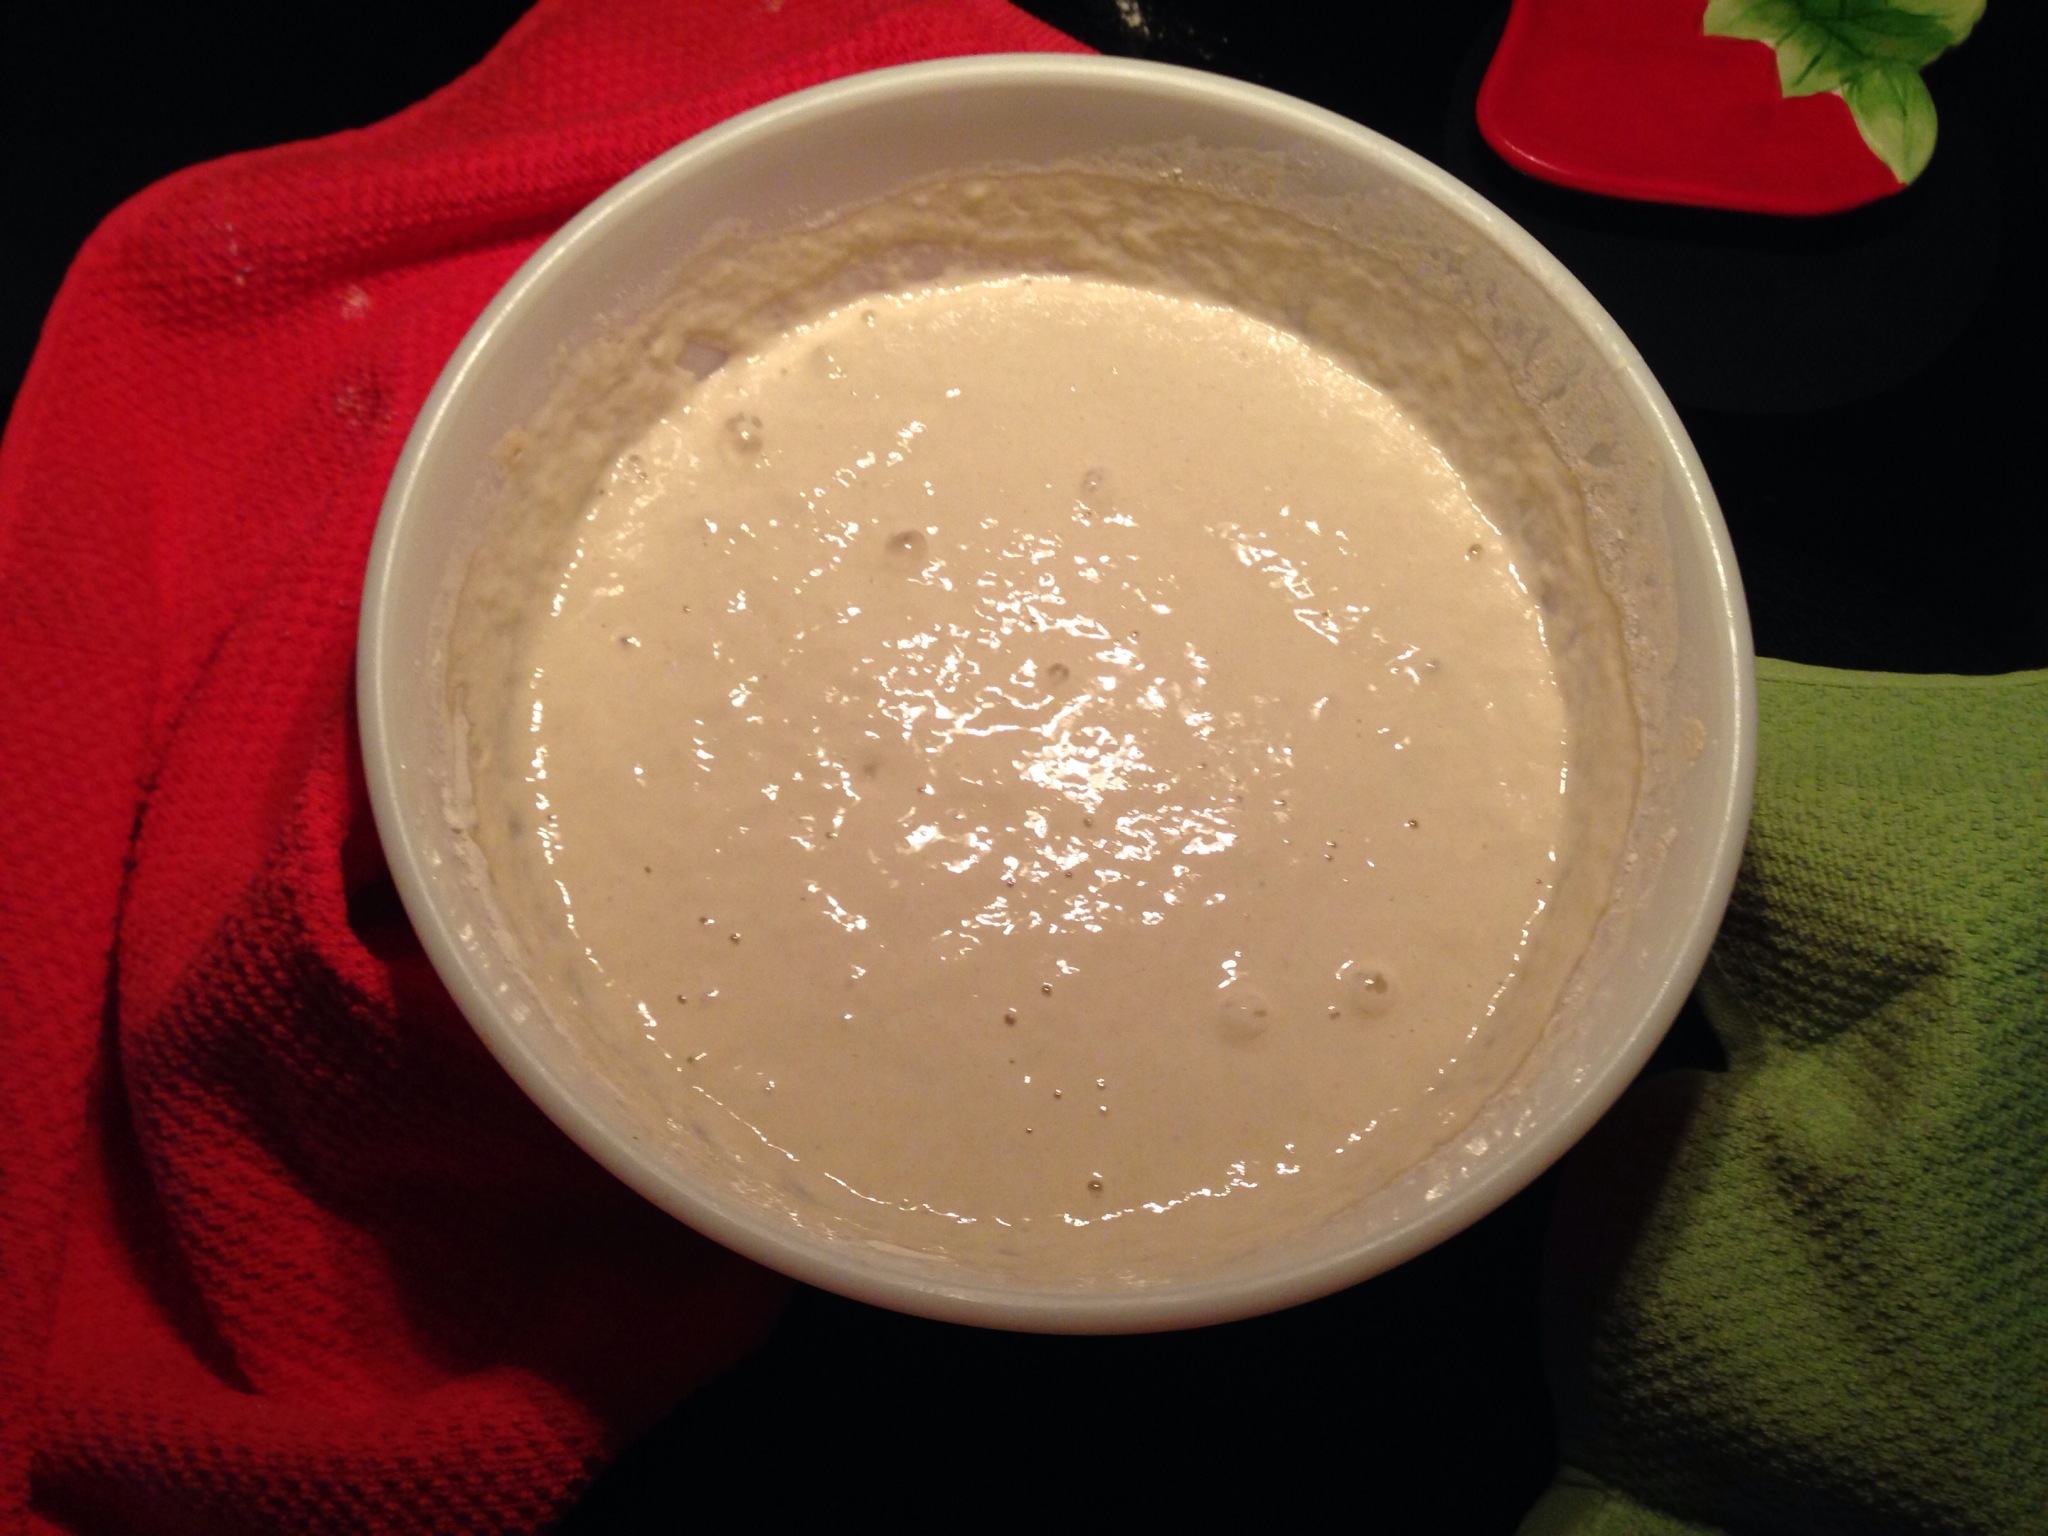
Pictured above is the Muffin Mix. First of all, the mix will make one dozen muffins. That is twice as many as any other mix I have tried. The mix comes plain and we wanted to test out a variety, so I added frozen blueberries, peanut butter and chocolate chips, chocolate chips, and finally cocoa and chocolate chips. I also added a little applesauce to the ones I added cocoa powder to. This was to add moisture and some needed sweetness. Each and every flavor is wonderful! My favorite is the blueberry and my daughter’s favorite is the peanut butter chocolate chip.

If you are already gluten free or just want to try out gluten free, go to http://www.thebloomfieldfarms.com and place your order. You can probably find the All Purpose Baking Mix and possibly the Brownie Mix in your local Kroger. I have requested to have more Bloomfield Farms items in my local store but for now, I have to order online. We are looking forward to trying out the other three mixes and I will certainly be letting you know how they taste! I love the convenience of purchased mixes and I am optimistic that the other mixes will by just as fantastic as those I have already tried. Happy Gluten Free eating!

This is an independent product review. I am not affiliated with or compensated by Bloomfield Farms. I just love their products!

Bread Quest! Sour Dough Lovers Unite!

The Sour Dough Kit from Williams-Sonoma

The Sour Dough Kit from Williams-Sonoma

Journey to the perfect loaf!

Journey to the perfect loaf!

After learning that those with gluten intolerance may be able to successfully tolerate sour dough bread, I have been on the quest to find and make the perfect loaf of sour dough bread.
I read where the sour dough starter actually cancels out the gluten. My sweet daughter, has an auto-immune disease which greatly benefits from a gluten-free diet. We learned that she does tolerate and digest sour dough bread. Of course, I am certainly going to do my part in helping her find quality foods that are within her diet.
My first attempts at making my own starter were from “scratch”. It took eight days to ferment the starter and begin baking. After six very dense, fair tasting loaves, I was able to make a pretty good loaf. My starter however, was a bit frustrating to me as it seemed to take about two days to proof a loaf. I also thought it needed to have a better taste.
I started searching for the best sour dough bread I could find. Topping the list was San Francisco Sour Dough Bread made in a bakery in San Francisco. I also learned you could purchase a sour dough starter kit from Williams-Sonoma. (I am not associated with Williams-Sonoma. I am just a customer.)
It arrives with a nice little crock to keep your starter preserved in.

I found the detailed instructions a bit difficult to understand but I ended up with a good end product so I suppose I came close to following it correctly. It begins by combining the starter with warm water and all-purpose flour.

[caption id="attachment_437" align="alignnone" width="300"]Combining the starter packet with warm water and flour. Combining the starter packet with warm water and flour.

Next, cover the bowl and allow to rest. Stirring the mixture at regular intervals is
important in the fermentation process.

Note the large bubbles on top of the mixture.  This is ready for division and feeding.

Note the large bubbles on top of the mixture. This is ready for division and feeding.


For the remaining 72 hours, you will be stirring at regular intervals until the mixture reaches it peak (lots of active bubbles), then you will reduce to 1/2 C mixture and add one cup of warm water and one cup of flour. (If it is bedtime, you will increase the flour and water to 2 or 3 cups and cover for the night) Upon rising, divide, reduce to 1/2 C and feed with 1 C warm water and flour.
The is the final division.  Fill your crock with starter and refrigerate.

The is the final division. Fill your crock with starter and refrigerate.

Beautifully Proofed Dough

Beautifully Proofed Dough


Two days later, I had to bake bread to see how the new starter would work. The recipe is easy. The night before baking, put 1/2 C starter in a bowl with 3 Cups warm water and 3 Cups flour. Cover overnight. The next morning, you will have beautiful starter called a sponge. It’s very bubbly! Take 2 1/2 Cups of the sponge and put it in your stand mixer, add 1 1/2 C flour and mix together. Allow it to rest an hour. Next, add one more C of flour, put on the dough hook, add a tablespoon of salt and slowing continue adding flour until you have a moist, non sticky dough. Put your dough into a bowl and allow to rise 8 to 13 hours! Yes, it takes that long! Yes, it will eventually work! Yes, it’s worth the wait!
Then the fun begins.
Shaping the dough into a round.

Shaping the dough into a round.

Creating a smooth loaf

Creating a smooth loaf


Once you have gone all the way around the dough and folded it upon itself. Place the round on a baking sheet sprinkled with corn meal. The dough is ready for a second rise. Allow the round to rise for 3 hours.
Finally, cut tic-tac-toe slits into the dough with a new razor blade. Brush with an egg wash, and place into a hot 400 degree oven for 10 minutes. After 10 minutes, reduce heat to 375 degrees and continue baking an additional 45 minutes.
The dough round is rising for a second time for 3 hours.

The dough round is rising for a second time for 3 hours.

Brush the loaf you just scored with a razor blade with the egg wash.

Brush the loaf you just scored with a razor blade with the egg wash.

This is a huge, crusty loaf of San Francisco Sour Dough Bread.

This is a huge, crusty loaf of San Francisco Sour Dough Bread.


The end product was a very beautiful round of San Francisco Sour Dough Bread. It is a very tasty bread. Next time, I will be making it in loaf pans to see how it holds up for sandwich bread. I am very encouraged by my first loaf. I feel like it can only get better as I get better at making it! Hope you give the San Francisco Starter a try if you enjoy baking bread or want to start.